Since I started my #100daysofbicycles drawings I’ve been getting lots of emails from my friends with pictures of their much loved bikes. I wanted to show you exactly what my process is for drawing my bikes, taking day 32 as my example.
I make a folder for each bike photo when I get it, labelled with its day number, so that when I sit down to draw, everything is ready to go and I don’t need to waste any time faffing about.
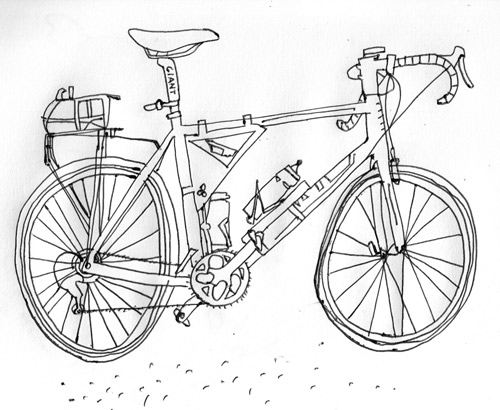
Draw and Scan
First I draw the bike in my notebook with a pen and then I scan it in. (If you don’t have a scanner you could take a picture with your phone and email it to yourself). I use Illustrator (version CS6) to digitise it and add colour. I made a blank template file with my signature at the bottom and the artboard sized correctly so I open that, rename it (do a “save as”), then place in the scanned sketch. (If you are working along with me, just open the scanned drawing in Illustrator or else go File>new, make a new document, then place in the file.)
Image Trace Panel
I open up the image trace panel (window>image trace, in older versions it may be called live trace) then toggle the advanced tab to open up more options. Click on the image to activate the panel, and turn on the preview check-box at the bottom. Because my image is just a line drawing, the default mode “black and white” is perfect.
The most important part of the panel is the Threshold slider. This determines how much of your image Illustrator will pick up. If you have a faint line you will need to up the threshold. Mine is with a black biro so you can see from the screen grab below that I don’t have to go much higher than the default. The next most important slider is noise: noise means fine detail. If you are missing some detail turn the noise down to 1 (a bit counter intuitive I know but you’ll get used to it).
I turn off “snap curves to lines” and leave off “ignore white” (it’s off by default). Make sure you are zoomed in close enough to see if you are getting all of your image and you are happy!
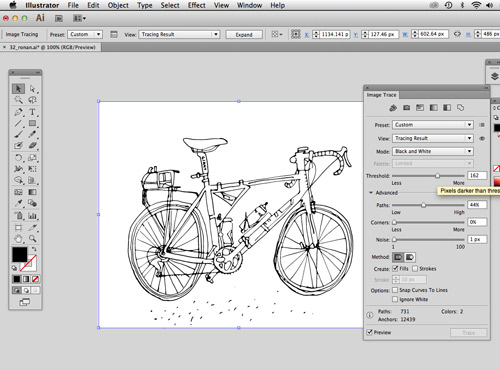
I love this technique because you can retain all the wonkiness and hand drawn look of the sketch, and I like how the flat colour is so perfect next to that.
Expand and Ungroup
Once you are happy with your trace, click the Expand button in the options panel. Then right-click and ungroup. Next click away from the picture to deselect the everything.
Delete unwanted parts
Because I left “ignore white” off, my image is filled with white. First I delete the background white, then I go through the image and delete the parts I want to have no fill – here it’s the spaces between the spokes. Use the black arrow to click and delete each one (shift-click if you want to select more than one bit at a time and delete all at once with the delete/backspace key).
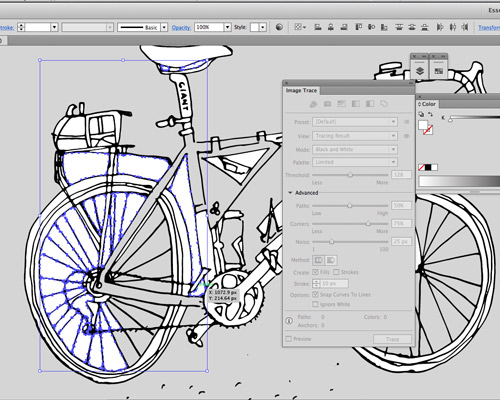
Draw and Erase
If I needed to add a line I could do it now with the blob brush. Click on the existing line first with the black arrow to select the colour, then select the blob brush and draw your line. The size of the brush can be changed by using the right square bracket to make it bigger “]” or the left square bracket to make it smaller “[“.
If you need to erase a bit, you can use the eraser tool (again change the size of the eraser with the square brackets on your keypad).
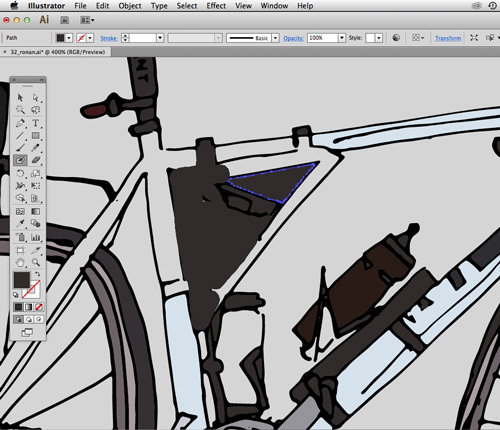
Eyedropper and colour
Now you can place your photo of the bicycle for reference into your document (file>place). You can select the existing coloured (white) parts of your drawing and use the eyedropper to sample colours from the photo. First select the colour from your drawing you want changed, then click the eyedropper, then click on the colour you want it to change to. Be sure to switch back to the black arrow once you’ve changed the colour otherwise you will click on another colour you don’t want! The eyedropper will give you a good starting point but usually I tweak the colour after I select it. I also have the drawing moved off the artboard so that it’s easier to see (the artboard is white).
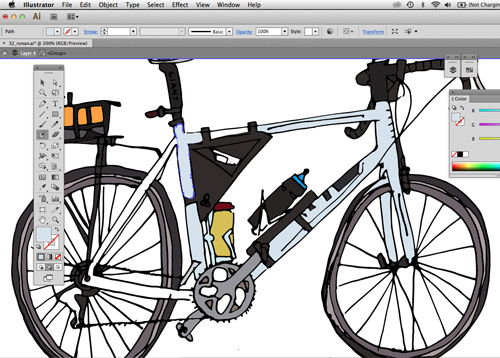
Some parts of the image that I want coloured won’t have white, they will be empty. This is because there was a tiny gap in the line and the colour was connected to the background which was deleted in the one go at the start. In these instances you will need to add colour with the blob brush. I use the “draw behind mode” button at the bottom of the tool bar so that the black line appears above whatever colour I’m using. This is very handy! (Alternatively you can right-click your colour and go Arrange >send to back, or else draw your colour in a layer beneath).
(If you try and change a colour but it keeps coming out greyscale, go to the colour panel flyout menu (top right of panel) and change your selection from greyscale to RGB or CMYK.)
If you colour too much use the eraser tool. Tip: select just the colour on its own (with the black arrow) before erasing – this will prevent you erasing anything else. Have nothing selected if you want to erase everything.
Sometimes you can save 5 seconds (!) by clicking on the white and going Select (in menu) select Same>Appearance> then changing all the white at once to another colour. I sometimes do this near the end once most or all of the other colours are taken care of. Or you might want to do this to the black line to make it a softer colour.
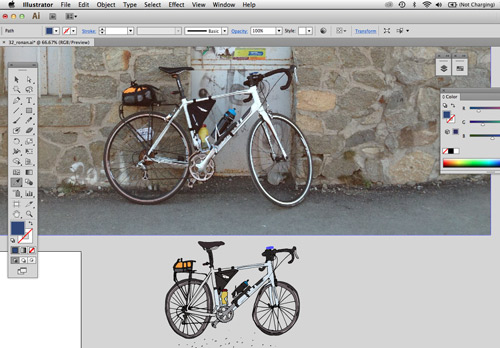
Once all is coloured I move it onto the artboard (I usually group it first (right click>group). Then I see about adding a background colour or maybe some shapes. If you haven’t your artboard already set up, click on the artboard tool (in the tool bar) and put in the required dimensions in the top right corner of the options panel, next click any tool in the tool bar to return to the regular drawing mode.
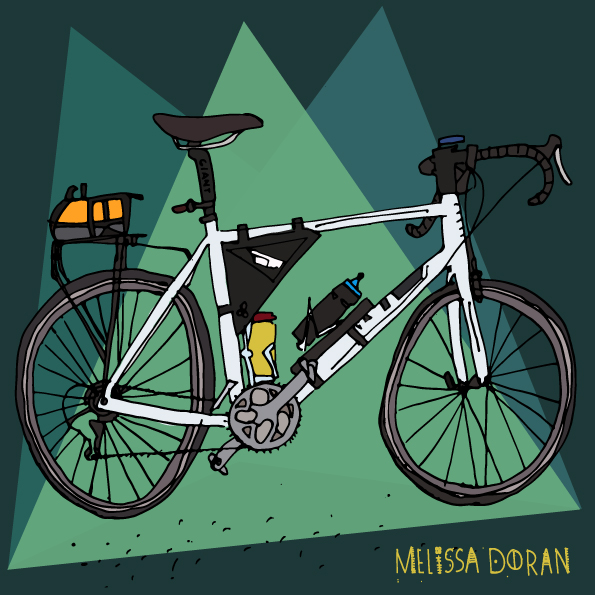
Then I go File>export (use artboards, range 1) and email my pic to my phone, I might be over cautious exporting (large file size) instead of just file>save for web (small file size) but I do it anyways. Finally, I upload it to instagram, play around with a filter and end with #100daysofbicycles. Ta-Dah!!
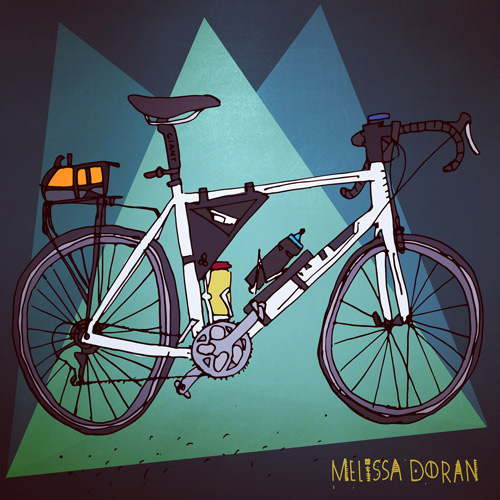
I can teach you all this and much more if you come to my next Digital Illustration Workshop in Dublin :) In the meantime please follow along with my project on instagram and please say hi!
*Update* here are two videos: first the drawing then the Illustrator bit (timelapse)…
Related Reading:
How to use the live trace tool in Illustrator CS6 to digitise your line drawing
Make Art That Sells Week 1 Part A
Pattern Observer webinar: The Importance of Developing Collections
Stetchbook Explorations with Lisa Congdon